Adding textures to 3D models on the N64

Once you have your 3D model set up, you’ll find that the colouring of it can be a bit plain with just flat colours or Gouraud shading. To remedy this and make it look a bit more realistic, you’re going to want to be adding textures to the faces of your model.
I will try to automate all these steps by building upon the texture conversion program and upgrading it to a model conversion program, but this will have to do for now.
For this tutorial, you’ll need an image that you want to place on a polygon. I’ll be using this website’s 16×16 favicon as an example, but any other image can work.
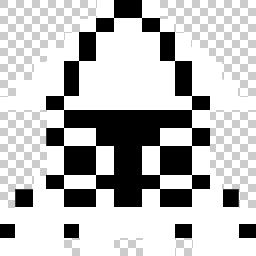
The texture we’ll be using.
Steps
- Paint your texture
- Convert it to a C array
- Attach to a polygon/primitive
Painting your texture
This is the fun part. This is when you open up your image manipulation program and draw up a texture.
Any size is good, but powers of 2 are preferred (8×8, 16×16, 32×32, etc). The N64’s texture memory is 4kB (4096 bytes) so your texture must fit within that boundary, depending on the pixel component size (8, 16 or 32-bit).
Convert it into a C array
This part is more complicated, and will require a program to convert. The original program used to convert textures was called rgb2c, but will only work on SGI IRIX workstations. I have devised a program that will let you do it right on this website. This will convert it to an array of 16-bit colours.
You can convert your png image to N64-useful C using the X2C converter.
Once you have your file, you will want to include it by adding the following code to the top of your file to make it accessible:
#include "texture.h"
Of course, filenames may vary.
unsigned short favicon[] = {
0xfffe, 0xfffe, 0xfffe, 0xfffe, 0xfffe, 0xfffe, 0xffff, 0xbdef, 0xbdef, 0xffff, 0xfffe, 0xfffe, 0xfffe, 0xfffe, 0xfffe, 0xfffe,
0xfffe, 0xfffe, 0xfffe, 0xfffe, 0xfffe, 0xffff, 0xbdef, 0xffff, 0xffff, 0xbdef, 0xffff, 0xfffe, 0xfffe, 0xfffe, 0xfffe, 0xfffe,
0xfffe, 0xfffe, 0xfffe, 0xfffe, 0xffff, 0xbdef, 0xffff, 0xffff, 0xffff, 0xffff, 0xbdef, 0xffff, 0xfffe, 0xfffe, 0xfffe, 0xfffe,
0xfffe, 0xfffe, 0xfffe, 0xffff, 0xffff, 0xbdef, 0xffff, 0xffff, 0xffff, 0xffff, 0xbdef, 0xffff, 0xffff, 0xfffe, 0xfffe, 0xfffe,
0xfffe, 0xfffe, 0xffff, 0xffff, 0xbdef, 0xffff, 0xffff, 0xffff, 0xffff, 0xffff, 0xffff, 0xbdef, 0xffff, 0xffff, 0xfffe, 0xfffe,
0xfffe, 0xffff, 0xffff, 0xffff, 0xbdef, 0xffff, 0xffff, 0xffff, 0xffff, 0xffff, 0xffff, 0xbdef, 0xffff, 0xffff, 0xffff, 0xfffe,
0xffff, 0xffff, 0xffff, 0xbdef, 0xffff, 0xffff, 0xffff, 0xffff, 0xffff, 0xffff, 0xffff, 0xffff, 0xbdef, 0xffff, 0xffff, 0xffff,
0xfffe, 0xfffe, 0xfffe, 0xffff, 0x0001, 0x0001, 0x0001, 0x0001, 0x0001, 0x0001, 0x0001, 0x0001, 0xffff, 0xfffe, 0xfffe, 0xfffe,
0xfffe, 0xfffe, 0xfffe, 0x0001, 0xffff, 0xffff, 0x0001, 0x0001, 0x0001, 0x0001, 0xffff, 0xffff, 0x0001, 0xfffe, 0xfffe, 0xfffe,
0xfffe, 0xfffe, 0xfffe, 0xffff, 0x0001, 0x0001, 0xffff, 0x0001, 0x0001, 0xffff, 0x0001, 0x0001, 0xffff, 0xfffe, 0xfffe, 0xfffe,
0xfffe, 0xfffe, 0xfffe, 0xffff, 0x0001, 0x0001, 0xffff, 0x0001, 0x0001, 0xffff, 0x0001, 0x0001, 0xffff, 0xfffe, 0xfffe, 0xfffe,
0xfffe, 0xfffe, 0xffff, 0x0001, 0xffff, 0xffff, 0x0001, 0x0001, 0x0001, 0x0001, 0xffff, 0xffff, 0x0001, 0xffff, 0xfffe, 0xfffe,
0xfffe, 0xbdef, 0xffff, 0xffff, 0xbdef, 0xbdef, 0xffff, 0x0001, 0x0001, 0xffff, 0xbdef, 0xbdef, 0xffff, 0xffff, 0xbdef, 0xfffe,
0xffff, 0xffff, 0xffff, 0xffff, 0xffff, 0xffff, 0xffff, 0xffff, 0xffff, 0xffff, 0xffff, 0xffff, 0xffff, 0xffff, 0xffff, 0xffff,
0xbdef, 0xffff, 0xffff, 0xffff, 0xbdef, 0xffff, 0xffff, 0xffff, 0xffff, 0xffff, 0xffff, 0xbdef, 0xffff, 0xffff, 0xffff, 0xbdef,
0xffff, 0xffff, 0xffff, 0xffff, 0xfffe, 0xffff, 0xffff, 0xfffe, 0xfffe, 0xffff, 0xffff, 0xfffe, 0xffff, 0xffff, 0xffff, 0xffff,
}
Graphic.h
One small thing to remember is that the texture needs to be prototyped (declared, but empty). To do this, go to graphic.h and add this quick line anywhere of code to avoid the ‘undeclared’ error:
extern unsigned short favicon[];
Attach the texture to a primitive
The final step to adding textures to a N64 model is that you need to load the texture into the Texture Memory (TMEM), and have it display correctly.
For the sake of this example, we’ll be using nu0 as a base for experimentation, specifically the final section of stage00.c:
/* The vertex coordinate  */
static Vtx shade_vtx[] =  {
        {        -64,  64, -5, 0, 0, 0, 0, 0xff, 0, 0xff	},
        {         64,  64, -5, 0, 0, 0, 0, 0, 0, 0xff	},
        {         64, -64, -5, 0, 0, 0, 0, 0, 0xff, 0xff	},
        {        -64, -64, -5, 0, 0, 0, 0xff, 0, 0, 0xff	},
};

/* Draw a square  */
void shadetri(Dynamic* dynamicp)
{
	gSPMatrix(glistp++,OS_K0_TO_PHYSICAL(&(dynamicp->projection)),
		G_MTX_PROJECTION|G_MTX_LOAD|G_MTX_NOPUSH);
	gSPMatrix(glistp++,OS_K0_TO_PHYSICAL(&(dynamicp->modeling)),
		G_MTX_MODELVIEW|G_MTX_LOAD|G_MTX_NOPUSH);

	gDPPipeSync(glistp++);
	gDPSetCycleType(glistp++,G_CYC_1CYCLE);
	gDPSetRenderMode(glistp++,G_RM_AA_ZB_XLU_DECAL, G_RM_AA_ZB_XLU_DECAL2);
	gSPTexture(glistp++,0x8000, 0x8000, 0, 0, G_ON);
	gDPSetCombineMode(glistp++,G_CC_DECALRGBA, G_CC_DECALRGBA);
	gDPSetTextureFilter(glistp++,G_TF_POINT);
	gDPLoadTextureBlock(glistp++,favicon, G_IM_FMT_RGBA, G_IM_SIZ_16b, 16, 16, 0,
				 G_TX_WRAP | G_TX_MIRROR, G_TX_WRAP | G_TX_MIRROR,
				 4, 4, G_TX_NOLOD, G_TX_NOLOD);

	gSPVertex(glistp++,&(shade_vtx[0]), 4, 0);
	gSP2Triangles(glistp++,0,1,2,0,0,2,3,0);

	gSPTexture(glistp++,0, 0, 0, 0, G_OFF);

	gSPEndDisplayList(glistp++);
}
Load the texture into TMEM
First, we’re going to edit all the bits under /* Draw a square */. Some parts will be rearranged, some deleted and some added, so I’ll go through each and every bit. I removed some buts that were there before like gDPSetRenderMode and gSPClearGeometryMode for the sale of simplicity, but it’s recommended that you keep them there.
void shadetri(Dynamic* dynamicp)
{
	gSPMatrix(glistp++,OS_K0_TO_PHYSICAL(&(dynamicp->projection)),
		G_MTX_PROJECTION|G_MTX_LOAD|G_MTX_NOPUSH);
	gSPMatrix(glistp++,OS_K0_TO_PHYSICAL(&(dynamicp->modeling)),
		G_MTX_MODELVIEW|G_MTX_LOAD|G_MTX_NOPUSH);

	gDPPipeSync(glistp++);
	gDPSetCycleType(glistp++,G_CYC_1CYCLE);
	gDPSetRenderMode(glistp++,G_RM_AA_ZB_XLU_DECAL, G_RM_AA_ZB_XLU_DECAL2);
	gSPTexture(glistp++,0x8000, 0x8000, 0, 0, G_ON);
	gDPSetCombineMode(glistp++,G_CC_DECALRGBA, G_CC_DECALRGBA);
	gDPSetTextureFilter(glistp++,G_TF_POINT);
	gDPLoadTextureBlock(glistp++,favicon, G_IM_FMT_RGBA, G_IM_SIZ_16b, 16, 16, 0,
				 G_TX_WRAP | G_TX_MIRROR, G_TX_WRAP | G_TX_MIRROR,
				 4, 4, G_TX_NOLOD, G_TX_NOLOD);

	gSPVertex(glistp++,&(shade_vtx[0]), 4, 0);
	gSP2Triangles(glistp++,0,1,2,0,0,2,3,0);

	gSPTexture(glistp++,0, 0, 0, 0, G_OFF);

	gSPEndDisplayList(glistp++);
}
Let’s go through line by line. Note: glistp++ means “add this to the ‘glistp’ display list”, so I won’t bring it up for each line.gSPMatrix, gDPPipeSync and gDPSetCycleType stay the same so we can ignore them.
gDPSetRenderMode(glistp++,G_RM_AA_ZB_XLU_DECAL, G_RM_AA_ZB_XLU_DECAL2);
We change the value for gDPSetRenderMode to G_RM_AA_ZB_XLU_DECAL because it allows us to better render textures, especially since the one in this example has some alpha transparency. Without this, the texture would output those areas as an opaque version of what they would be.
gSPTexture(glistp++,0x8000, 0x8000, 0, G_TX_RENDERTILE, G_ON);(glistp++,0x8000, 0x8000, 0, G_TX_RENDERTILE, G_ON);
This is the first bit that is different from before. What gSPTexture does is set a few settings for loading textures.
0x8000, 0x8000, refers to the scale of the texture, this sets it to hex 8000 (32,768 in decimal).
The lonely 0,is the level of mipmapping that will be used in this texture (minus one). Since we only have one size, it calculates to 1 – 1 = 0.
G_TX_RENDERTILE, is a constant which equals 0. This is the tile index (value 0-7), which means that it is where the largest resolution texture is located. Again, since we only have one resolution for our bitmap, this isn’t very important.
G_ON tells the function to save these settings. If you were to use G_OFF, then that would reset them all to 0.
gDPSetCombineMode(glistp++,G_CC_MODULATERGBDECALA, G_CC_MODULATERGBDECALA);
This sets the colour combiner mode for adding textures. The colour combiner takes colour from different sources (eg. texel, vertex, ambience, lighting, etc) and mixes them in a particular way to give the desired output.
G_CC_MODULATERGBDECALA is one of many modes that means that the colour is a combination of the shading (vertex colour) and texture colour; and the transparency is taken from the texture (ignoring that of the vertices).
gDPSetTextureFilter(glistp++,G_TF_POINT);
This simple line changes the setting for rendering textures to point sampling/nearest neighbour. This gives our 16×16 texture a ‘pixely’ feel when stretched rather than a blurry appearance.
gDPLoadTextureBlock(glistp++,tex_1, G_IM_FMT_RGBA, G_IM_SIZ_16b, 16, 16, 0, G_TX_WRAP | G_TX_MIRROR, G_TX_WRAP | G_TX_MIRROR, 5, 5, G_TX_NOLOD, G_TX_NOLOD);
This is the line of code that actually does what we want to do.
tex_1 is the name of the texture array from the previous step where you converted the png to the array. It doesn’t really matter what the name is, as long as it’s the same as the texture you want to load.
G_IM_FMT_RGBA is the colour mode of the texture. Here we’ll be using an RGBA format since that is how we converted the texture to C in the previous step, but other formats are available.
G_IM_SIZ_16b indicates the size of each texel, in this case 16 bits.
16, 16, is the width and height of the texture.
0, is the location of the palette. This texture doesn’t use a palette, so we can ignore it.
G_TX_MIRROR, G_TX_MIRROR, don’t have much effect on this code since we’re filling the face with only one instance of the texture. Basically, these determine the rules for what to do when the polygon is bigger than the texture, whether to repeat the pattern, mirror it or stretch the last pixel. Since since this example will have the texture fit the polygon once, there is no need to worry about this.
5, 5, the the amount of texel bits to mask. In this case, it works out to be 25 = 32. What that means is that the above repetition in G_TX_MIRROR will occur every 32 texels. Since our source texture in this example is 16×16, this will have no effect unless it is 3 or less.
G_TX_NOLOD, G_TX_NOLOD refers to the shift value of the texture. It is used for mipmapping so this will be left as off for this example.
gSP2Triangles(glistp++,0,1,2,0,0,2,3,0);
gSPTexture(glistp++,0, 0, 0, 0, G_OFF);
gSPVertex loads the vertices into memory and gSP2Triangles finally renders the primitives. This has been explained in more detail in nu0.
gSPTexture(glistp++,0, 0, 0, 0, G_OFF);
Much like the previous function a few lines up, this unsets all the texture settings.
And that’s all there is to that section!
Adding texture coordinates
Next we have to amend the list of vertices in order to mark them with a particular texture coordinate. I went into a bit more detail about how the properties of vertices in fiddling with vertices. That article ignored the t and c values, so we’ll go into them over here. A quick recap though:
{x,	y,	z,	f,	t,	c,	r,	g,	b,	a}
{64,	64,	-5,	0,	0,	0,	0,	0xff,	0,	0xff}
x, y, z, is the 3d coordinates of the vertex, f, is for flags (unused), t, c, are the texture coordinates (x & y respectively) and r, g, b, a, is the colour and transparency values for the vertex.
This means that we are going to focus on value #6 and #7 for each line. For visual reference, these are the coordinates for each point on the square:
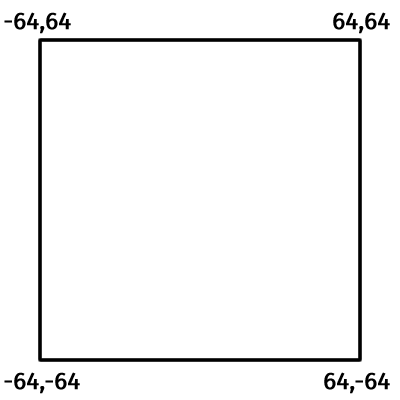
Vertex coordinates for each point. Note: each has a z-value of -5.

Texture coordinates for each point on the square.
And this is the final code that we’ll be striving towards:
static Vtx shade_vtx[4] =  {
    {   -64, 64, -5, 0, 0  << 6, 0  << 6, 255, 255, 255, 255},
    {   64,  64, -5, 0, 15 << 6, 0  << 6, 255, 0,   0,   255},
    {   64, -64, -5, 0, 15 << 6, 15 << 6, 0,   255, 0,   255},
    {   -64,-64, -5, 0, 0  << 6, 15 << 6, 0,   0,   255, 255},
};
There is only two differences in this code to that which was there originally. First off, the 0xff value was replaced with 255. This is merely a change in the value from hexadecimal to decimal. It has no effect on the output.
The other difference is that the t and c values have been changed to 0 << 6 or 15 << 6. These indicate the texture coordinates. Since the texture is 16 pixels wide, 0, 0, represents the top left corner and 15, 15, is the bottom right. The parts that say << 6 are bitshifts to scale up the texture by 26.
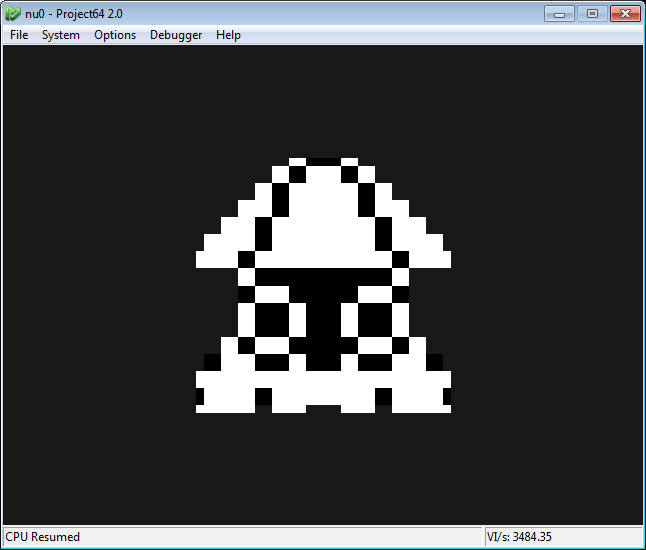
Compiling
Once you compile the code, the result should look something like this:
Additional resources
- nu0 – The code this tutorial is based on
- Fiddling with vertices – A bit more detail as to how to load vertices
- Image formats and data types – This tutorial used 16-bit RGBA, but there are more image formats more suitable to each situation. This page goes through each type available and how to work with it.