The real Fierce Deity sword from Majora’s Mask
I had no idea this was a thing, but after seeing it I’m glad to have come across this. It’s a video of a team of blacksmiths making the Firece Deity sword from The Legend of Zelda: Majora’s Mask in real life and testing out how it works.
Fierce Deity sword IRL
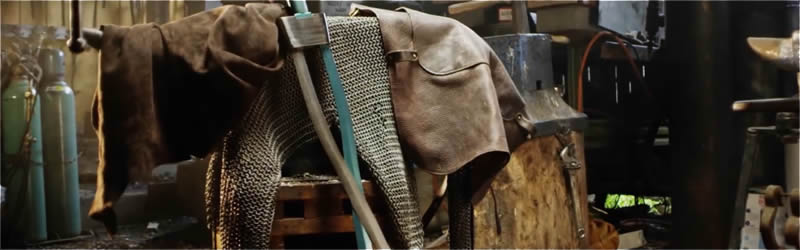
I’m Carey
We are the Stagmer Brothers of Baltimore Knife and Sword
Our work can be seen on film, Broadway and at renaissance festivals around the country. We’re going to be building some of your favorite weapons and some weapons that you’ve never seen before.
This is Man at Arms: Reforged
When I was a kid my best friend Travis and I used to wake up every day about 30 minutes early before
school to play Zelda. Although this sword is not in the
original series I’m really excited for this build. There are two parts to the Diety Sword: one will be forged in Damascus and the
other in w2.
This is a fairly complex technique which is, in principle, the same as making a multi-core viking sword but without the central core.
I’ll be forging the W2 half and Ilya will be doing the Damascus. Since Ilya was occupying the power hammer, Carey and I moved to the hydraulic press to forge out the W2.
After drawing the billet out Ilya cuts and restacks the billet in order to get a higher layer count.
So Ilya’s already got his initial weld on that Damascus restack, so now he’s going to the hammer and he’s using the drawing dies and he’ll be drawing it out to his bar.
Using a piece of square stock I asist in
forging the notches that will become our forge-bolted point and shoulders
Using the iron kist power hammer, Ilya
draws out the Damascus side of the Zelda sword to match the W2 side in length.
Ilya is using a mig welder to ensure
that we get a good weld. We just don’t want to be slide inside and slide up and down while we’re trying to do the forge weld
Okay now to the forge.
Forging together so often it sometimes feels like we’re a double-headed forging monster.
Here Ilya is going to apply some Flux to the tip, it’s going to work as an oxygen barrier. Any oxygen that gets in there really inhibits your weld, so we wanna make sure that that doesn’t happen. He’s gonna do the initial weld by hand on the anvil and we’ll go back in, get some more heat and go to the press. This is the most crucial stage of the whole sword making process for us – is getting these two welds at the top and the bottom good so we’re not gonna take any chances. Now that he’s got that probably solidly welded, we’re gonna double check it by going to the press and doing a little squish on the press.
Now that we got the tip welded, he’s gonna forge the point. Here is our second heat on forging the tip. You can see he’s just holding the blade at an angle. He returns to the flats to double check it. Now he’s adding a little bit of bevel to it. Still being very careful with each hammer blow to make sure that he doesn’t slide those welds apart.
So Ilya first used the hammer, set the weld slightly by hand and
then we went to the press like we usually do and finished the weld solding there.
Ilya’s got the shoulder and the tang area tag welded to ensure that we don’t have any slippage. So no we’re going to go to the heat and do the last crucial part of the forging.
After forging the blade, We’re going to profile it slightly on the sander to clean up the shape.
I’m going to use an air-powered die grinder to clean up the inside of the Zelda blade.
Ilya and I are getting ready to heat-treat our Zelda Deity Sword. We were initially going to stick it in with the forge one, we’re going to turn it off and use the residual heat to heat this up. This is a really high carbon steel blade so it’s going to be heat-treated much lower than what we’ve shown before because it’s two very different steels on either side. We just have to be really careful the heat doesn’t pull it form side to side and give it some warpage that at this point would be pretty impossible to fix.
We basically chose to replicate an ancient Viking technique of pattern welding with several cores, except this time we have a missing core in the centre. Which is very appropriate for the zen philosophy where everything rests on nothingness. Here, the most important billet, the central billet is absent, it’s nothing. And that’s how you get a magic sword.
What Matt is doing right now is striking the sword right up to quench. At this point the steel in the super plastic stage before the crystals decide to form the way they want to. If Matt takes too long doing this, the sword will become glass-hard and he will snap the whole thing.
No pressure!
After tempering I take the blade to grinder and begin my long and steady process of bringing this blade to shape. Here I use a handheld belt sander to clean up the interior of the blade.
So I’ve been grinding on this for a couple of hours, it’s been the most complex shape that I’ve had to grind before so I’ve spent more time grinding this blade so far than any other blade that I’ve ever done. I’m at a 120 grit right now, I’m gonna take it through 400 so I got another hour or so to grind on it. But I’m really pleased with the way it’s gone so far. It’s been a test of my patience.
After many challenging hours of grinding I’m finally at the 400 grit stage, almost ready for polish.
Normally I’m very consistent with all my angles and how I grind, you can see here in all this that I’ve had to change my angles a lot. Nothing about this was a normal grind. Everything about this was about as complex as could be. Basically, more sculpting than sanding.
After the sanding, I move to the scotch brite wheel to smooth the surface to prepare it for the edging.
After selecting my piece and cutting it on the saw, I lay the blade over the guard and draw on my shoulders and tang and prepare it for milling.
So we’re milling on the Zelda guard, it’s a fairly large piece of metal we’ve gotta use a pretty big cutter so we started out this project by using a drill bit, and drilling a series of holes where we wanted to be able to have our cutter go. So these go all the way for the tang and they’ll be widened on the opposite side. These go down about halfway and create the shoulder that the blade will sit on to give it some extra strength with the guard. So what I’m going to do with these four holes into a slot about halfway down.
Now that we have our slot in our guard blank, it’s time to give it that classic Zelda form.
After using the vertical mill to rough slot my piece of wood, I used to torch to slowly heat the tang and force it over, forcing the slot to perfection.
Alright, we got our handle slotted for the Deity Sword. In the video game it’s a real simple round handle. I’m going to do a little bit more of an ovate turn round at the end just to give a better grip and because we have such a baby tang.
Alright at this point all our pieces are blanked out. I’ve got the steel guard a little piece of wood for the little insert here. I got the wood handle, powel, read it and there it is. Not pretty yet, but it could be used as a sword right now.
Boom. Zelda deity sword.
After polishing th blade, we were in for a not-so-pleasant surprise. The blade wouldn’t quite fit into our vertical tank, so I had to pour the acid out into a home-made horizontal tank and by hand, slowly rub the acid on to reveal the pattern.
Staying true to the game, I mask off the Damascus side and color the opposite side green. Getting ready to paint our W2 edge, tried a bunch of different ways to get that good Zelda green; just couldn’t find any way so we’re going to go with the paint. So if you polish your metal before you paint it, it’ll stay looking shiny and polished… like that!
We’re going to be heat-blowing the hilt, but first I have to make sure all our grinding lines are out. I use the scotch brite wheel to make this happen.
I went to our local hardware and had them mix me up a special color of green wood-stain. Here I apply it to the handle to get the desired color.
Cool thing about stain over paint when you’re doing the wood is you’ll still be able to see all the wood grain. If you painted over it it would just be a solid color and not look very natural.
Like me, I think that fans are going to be very pleased with this. We did the two-bar construction which is just goes with the game and the theory behind it. Each blade would’ve been more than worthy of making a blade of its own, but combined I believe this is pretty close to the ultimate sword blade.
[they proceed to test the sword out]Now this is really cool, I was never expecting something like this to ever happen. I was always in awe of the Fierce Diety character when I finally got a hold of it at the end of Majora’s Mask in that the character was so overpowered but was only available for use in boss fights. It kinda makes sense because they probably couldn’t program this fourth form of link to do all the puzzle solving things since they’d have to make a whole new set of animations for a character that few people would even see… But I’m going on a tangent here.
The Fierce Deity sword is really kicks ass, makes me wish I knew something about metallurgy but I don’t have the time or the patience to pull something like this off. It would still be really cool to be able to use this sword in cosplay if that’s something that you can do.
The only thing that they should have done is that the end they test it out with a bunch of objects on a table covered in straw, but they didn’t make a skull kid to kick the ass out of.