Composing & converting audio

In the parent page, we’ve looked at how to incorporate audio to your Libdragon project. This page will be about how to generate the music files in the first place so that you can start composing for the Nintendo 64.
I won’t be covering the artistic side of composing music here (since I’m rubbish at it anyway) but rather how to get it done technically with modern systems.
File types
There are three types of audio files used in Libdragon. Here is a brief summary of each one:
WAV (Waveform) – This is your classic uncompressed audio file. These are high-definition and very flexible, but that is traded off by having a very large filesize. To give you an example, a 10-second stereo audio clip at a standard sample rate takes up almost 2 megabytes – that’s half of the N64’s RAM!
XM (Extended Module) – This is the MIDI-equivalent file format for use in many retro demoscenes. Imagine it as a music sheet for a series of instruments, and each instrument has its own associated ‘note’ sample that can be played at different frequencies. Since it just needs one short sample for each instrument, it is much more compact than a WAV file.
YM (Yamaha Music) – Used for chiptune music. Based on the YM2149 chip used in home PCs from the 90’s like the Atari ST and Amstrad CPC as well as some other YM2149-compatible PCs like the Zx Spectrum 128, MSX Series and Tandy 100. Typically very small filesize but is limited to just using simple tones as the instruments.
WAV files
WAV files are the 2nd most popular file type around for storing audio so I won’t go into much detail about them.
The easiest way to make and edit them is by using Audacity. WAV files can be played on almost any software, but I use VLC player.
XM files
Extended Module is a file format initially used by FastTracker 2 but can now be created and edited by MilkyTracker since FT2 was discontinued in 1997.
XM is a MIDI-esque file format. However, unlike MIDI which only contains data about notes (pitch, length, instrument), XM also includes the samples (ie a short file which plays a single note). This makes the filesize larger than MIDI since MIDI relies on the audio player to provide the instrument’s samples, but gives XM the flexibility to choose your own sound font.
You can play XM files by using VLC player as well.
Starting from scratch
If you don’t have any files you want to convert and you just want to start a new audio file from scratch, you can start composing your XM file in Milkytracker since that will create the most realistic results
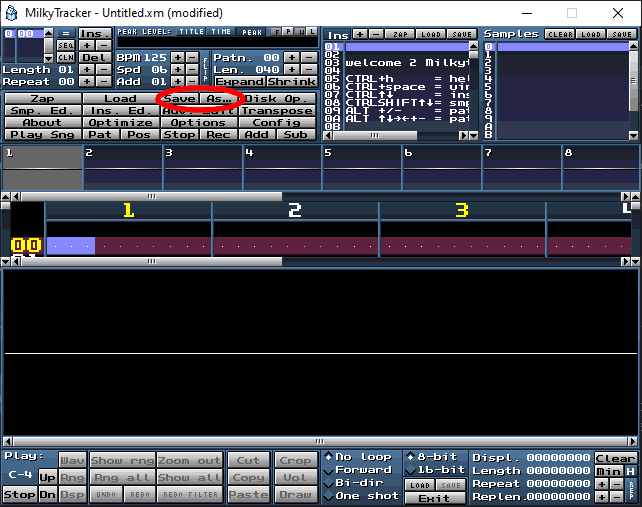
This tutorial by Gruber which is pretty good and to the point. The only difference is that you’re probably going to want to do is to import your own samples which you can do with the “Sample editor” screen and then save as XM.
Converting from MIDI to XM using MIDI2XM
This process is a lot more complicated, but it can be used to import melodies from the much more popular MIDI format into something usable by the Nintendo 64 or an XM editor.
Requirements
- 32-bit windows in a VM (I’m using Windows XP)
- MIDI2XM tool
- Source MIDI file
- Instrument samples
Setting up your environment
The first step is to download MIDI2XM. You can do this on the official website or on our local mirror using the password xmmymidi. The official link has the registration key on the download page, but I included it in the zip on the mirror.
Then, you need to set up Windows XP on a VM like Virtualbox. This is important since it only works on 32-bit systems. I have some instructions on the IDE page of the SDK section, but you can find instructions all over the internet. Also remember to enable file transfer (instructions also in that link) so that you can send files between your main PC and VM.
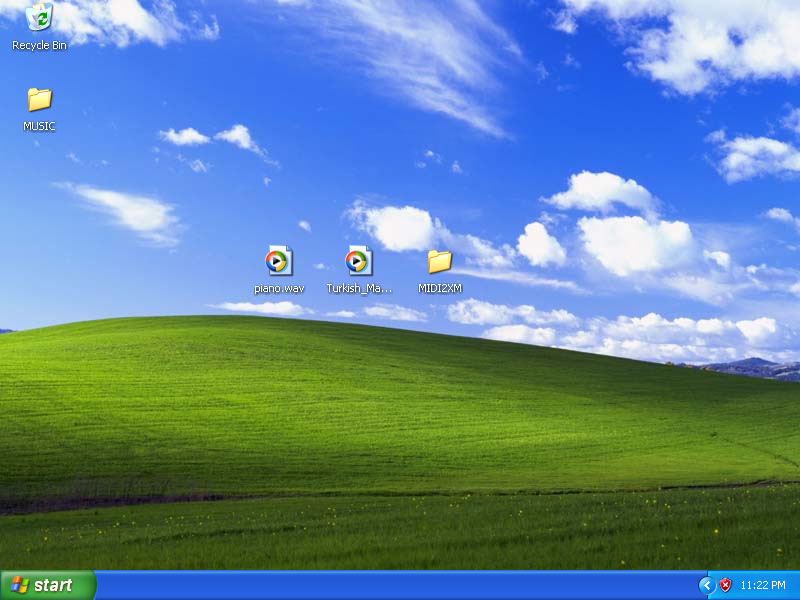
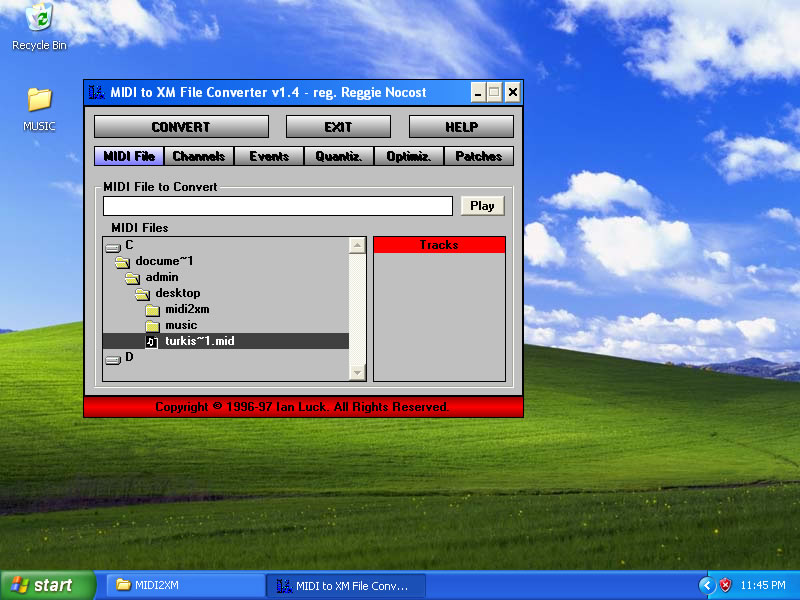
Copy over the MIDI2XM folder and your MIDI file to WinXP. I’m using a piano rendition of Mozart’s Turkish March. You should get something like this:
Generating some XI instrument files
Note: if at this point you try to run the conversion, you will end up with an empty file.
For this to work, you’ll need a .XI (Extended Instrument) file. This is a format to hold instrument samples in MilkyTracker, so you can generate them in two ways: With MilkyTracker or with MIDI2XM.
For either method, you’ll need a WAV file to serve as your source instrument. I got some from freewavesamples.
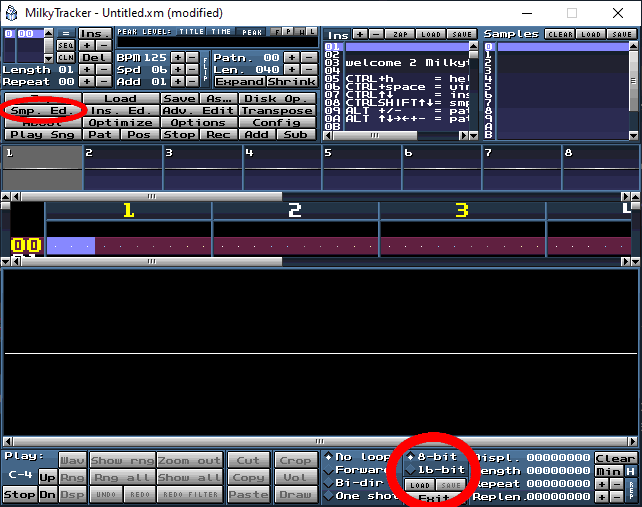
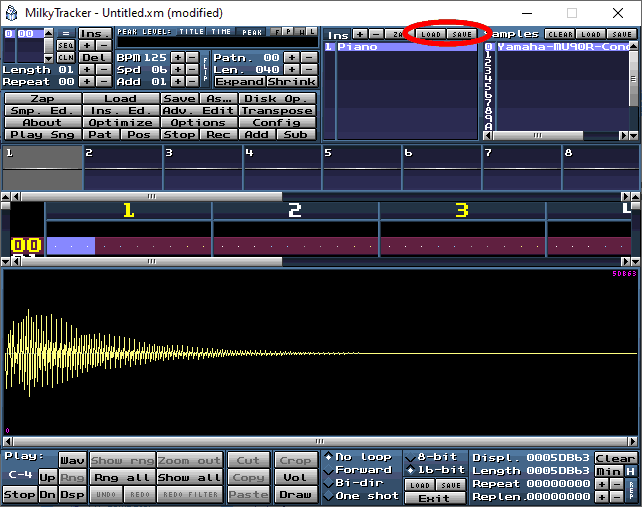
In MilkyTracker, you need to go to the sample editor (Smp. Ed.) to create your sample. Right-click the area and select “New…”
You can load it from a WAV file, or create your own using a generator through the right click menu. Once you’re happy with your instrument, you can export it to a XI file.
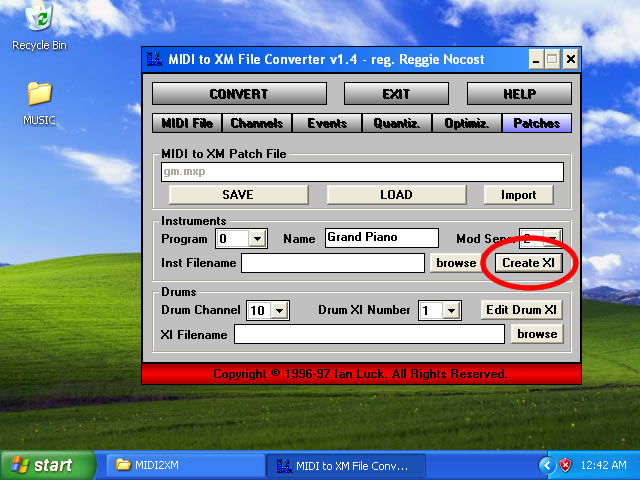
In MIDI2XM, this is done on the “Patches” tab where you can set all the instruments by index.
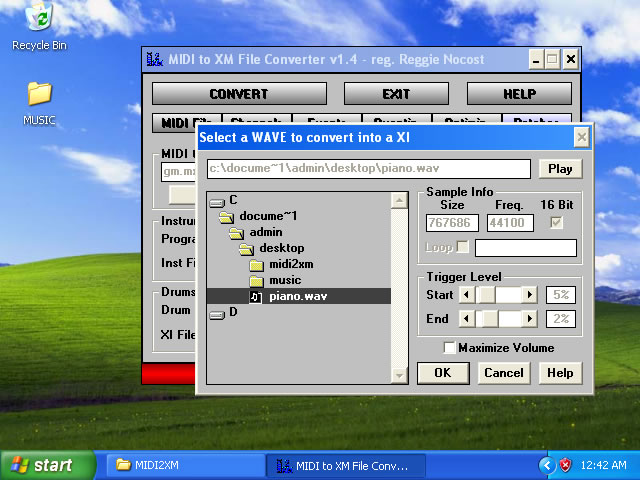
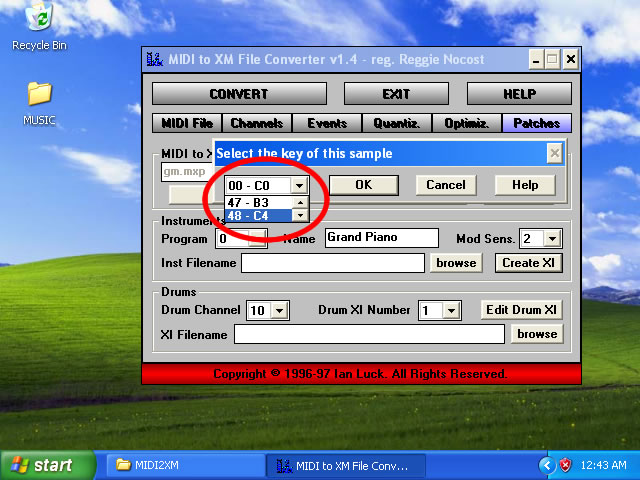
Press the “Create XI” button and navigate to wherever it is you put your WAV file. Doubleclick on it and set volume triggers if you like. Then select the note corresponding to the tone of your sample and voila, you’re all set.
Configuring MIDI2XM
Now we’re ready to open the executable. Open the folder and run MID2XM.EXE. The first time running, it will ask for a registration key, enter it and you’ll be greeted with this screen where you can doubleclick to select your file:
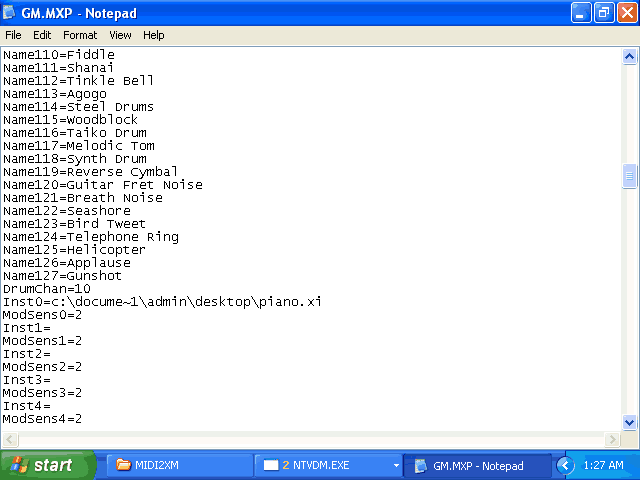
From there you can play the file to make sure it loaded correctly. Then leave everything else as default except the “Patches” tab. This is where you can set the XI file to correspond with each MIDI instrument. This might sound pretty tedious, but you only need to do it once since you can save these settings to a MXP file.

Exporting your XM file
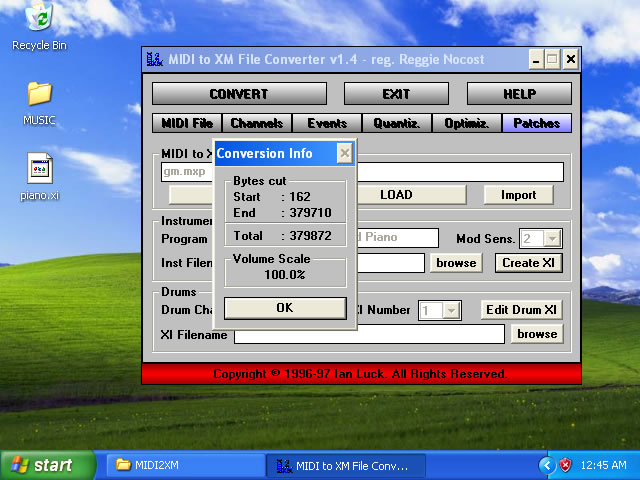
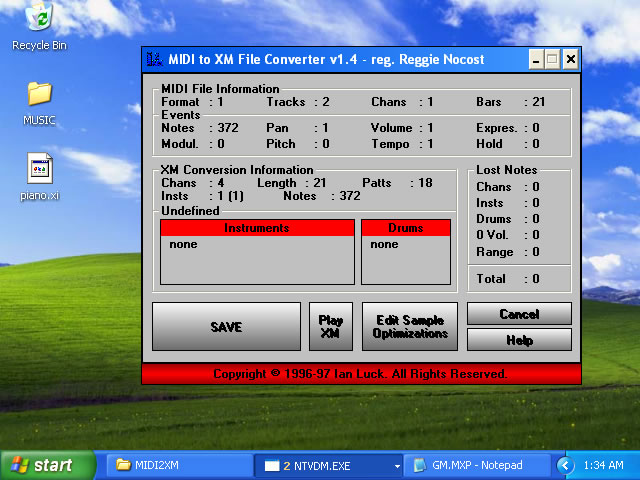
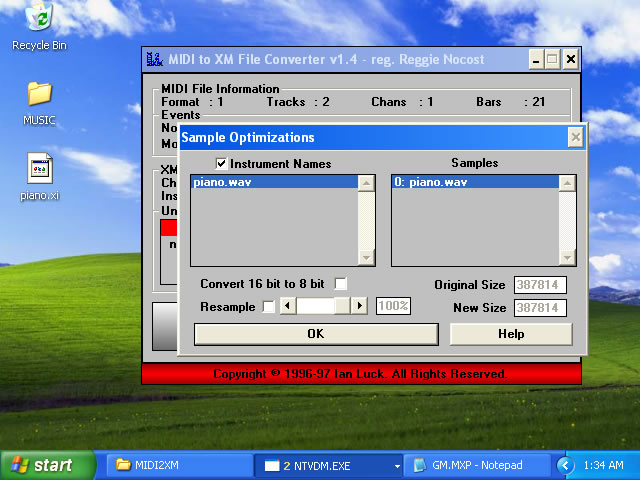
Once all the instruments are ready, you can click the big “Convert” button up on top to begin your conversion. The main screen shows the details of the conversion that is about to happen, but you can also preview your XM file with the “Play XM” button, or optimise your sample with the other one.
It’s best to optimise your sample to at least 8-bits since space on the N64 is limited and this cuts it in half.
Now you should have a nice XM file that you can work with. You can put it back into MilkyTracker to readjust the instruments or do some further editing if you like.
YM files
These files are much less common than WAV or XM files, so they’re more difficult to work with. They are also limited to just chiptune music (which XM can also do) so they should only be used if you’re really trying to create a lightweight game.
They’re so weird that you can’t listen to them on VLC, but instead have to use Audio Overload or ST-Sound.
Creating YM files with Arkos Tracker 2
YM files are primarily created with Arkos Tracker 2. This is a music composition software that is used to make music for the Amstrad CPC and other retro PCs, but it can also work for the N64.
You can create a YM file by going to File > Export > Export as YM.
Note that it can’t open YM files, so you’ll have to save it as its native AKS file format if you want to edit it later.
Recording YM files
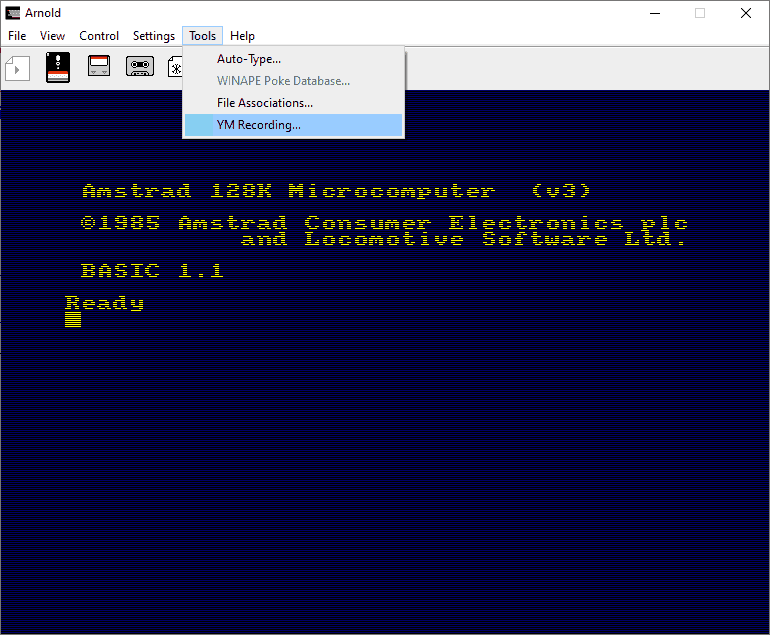
I’m still not entirely sure how this works, but you can create YM files by using the Arnold emulator.
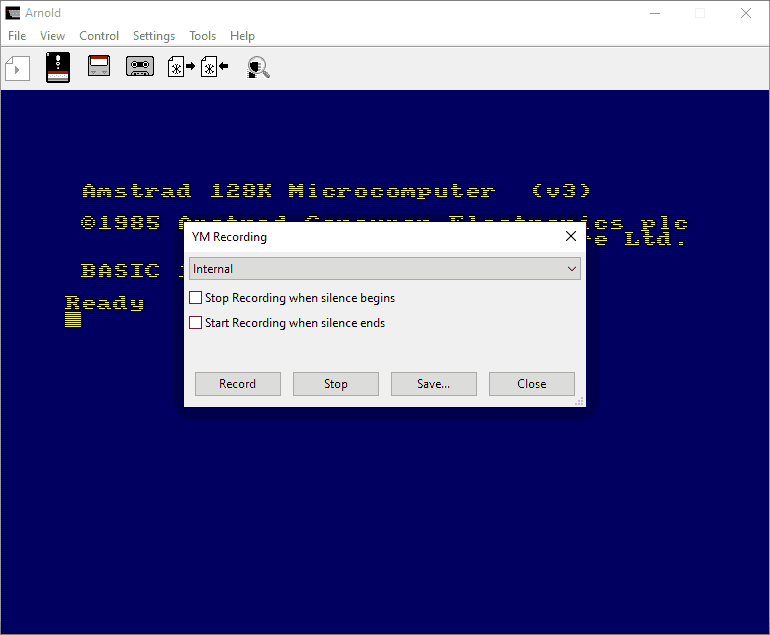
Open it and go to Tools > YM recording which will open the recorder.
I don’t know much about the Amstrad CPC so that’s about all I can find about it.
I assume that you need to have a CPC program that you emulate, and then start recording from there to generate the YM file. So there’s no editing software that I’ve seen or heard of. Sad!
It’s best to stick to XM format in my opinion. If you really want to use YM, it’s best to stick to tracks you can pull from somewhere else rather than to try to compose your own.