Textures in OpenGL

If you haven’t already, please read the Hello Triangle tutorial to understand the OpenGL pipeline and on the Nintendo 64 using Libdragon.
The key to drawing a texture on a surface is to do three things:
- Set up OpenGL and Libdragon to work with textures
- Upload the texture to TMEM
- Set the texture coordinates on the model
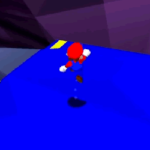
For this example, we’ll be using a cube with a texture on it. Here is the full code, but we’ll break down the relevant parts to loading textures bit by bit.
Working through the code
#include <libdragon.h>
#include <math.h>
#include <stdlib.h>
#include <GL/gl.h>
#include <GL/glu.h>
#include <GL/gl_integration.h>

int main(void)
{
	// Initialise the various systems
	display_init(RESOLUTION_320x240, DEPTH_16_BPP, 3, GAMMA_NONE, FILTERS_RESAMPLE);
	dfs_init(DFS_DEFAULT_LOCATION);
	rdpq_init();
	gl_init();

	// Setup
	float aspect_ratio = (float)display_get_width() / (float)display_get_height();
	float near_plane = 1.0f;
	float far_plane = 20.0f;

	// Set the viewing area
	glMatrixMode(GL_PROJECTION);
	glEnable(GL_DEPTH_TEST);
	glLoadIdentity();
	glFrustum(
		-near_plane*aspect_ratio,
		near_plane*aspect_ratio,
		-near_plane,
		near_plane,
		near_plane,
		far_plane
		);

	sprite_t* brick_sprite = sprite_load("rom:/images/brick.rgba16.sprite");
	float x = 0;
	float y = 0;
	float z = 0;

	// Main loop
	while(1) {
		// Start a new frame
		// Get the frame buffer
		surface_t* disp;
		surface_t *zbuf = display_get_zbuf();
		while(!(disp = display_try_get()));

		// Attach the buffers to the RDP
		rdpq_attach_clear(disp, zbuf);

		// Draw plain background
		glClear(GL_COLOR_BUFFER_BIT | GL_DEPTH_BUFFER_BIT);
		rdpq_set_mode_fill(RGBA32(128, 128, 128, 0));
		rdpq_fill_rectangle(0, 0, display_get_width(), display_get_height());

		// Start OpenGL context
		gl_context_begin();

			// Set the camera's position
			glMatrixMode(GL_MODELVIEW);
			glLoadIdentity();
			gluLookAt(
				0, 0, 10.0,
				0, 0, 0,
				0, 1, 0
				);

			// Settings for the texture
			glEnable(GL_RDPQ_TEXTURING_N64);
			glTexSizeN64(16, 16);

			// Upload the sprite
			rdpq_set_mode_standard();
			rdpq_mode_filter(FILTER_BILINEAR);
			rdpq_mode_blender(RDPQ_BLENDER_MULTIPLY);
			rdpq_sprite_upload(
				TILE0,
				brick_sprite,
				&(rdpq_texparms_t){
					.s.repeats = REPEAT_INFINITE,
					.t.repeats = REPEAT_INFINITE
				});

			glPushMatrix();
				// Rotate the cube
				glRotatef(x, 1.0f, 0.0f, 0.0f);
				glRotatef(y, 0.0f, 1.0f, 0.0f);
				glRotatef(z, 0.0f, 0.0f, 1.0f);

				const float size = 1.0f;

				glBegin(GL_QUADS);

					// Front face
					glTexCoord2f(0.0f, 0.0f); glVertex3f(-size, -size,  size);
					glTexCoord2f(1.0f, 0.0f); glVertex3f( size, -size,  size);
					glTexCoord2f(1.0f, 1.0f); glVertex3f( size,  size,  size);
					glTexCoord2f(0.0f, 1.0f); glVertex3f(-size,  size,  size);

					// Back face
					glTexCoord2f(1.0f, 0.0f); glVertex3f(-size, -size, -size);
					glTexCoord2f(1.0f, 1.0f); glVertex3f(-size,  size, -size);
					glTexCoord2f(0.0f, 1.0f); glVertex3f( size,  size, -size);
					glTexCoord2f(0.0f, 0.0f); glVertex3f( size, -size, -size);

					// Left face
					glTexCoord2f(0.0f, 0.0f); glVertex3f(-size, -size, -size);
					glTexCoord2f(1.0f, 0.0f); glVertex3f(-size, -size,  size);
					glTexCoord2f(1.0f, 1.0f); glVertex3f(-size,  size,  size);
					glTexCoord2f(0.0f, 1.0f); glVertex3f(-size,  size, -size);

					// Right face
					glTexCoord2f(0.0f, 0.0f); glVertex3f( size, -size,  size);
					glTexCoord2f(1.0f, 0.0f); glVertex3f( size, -size, -size);
					glTexCoord2f(1.0f, 1.0f); glVertex3f( size,  size, -size);
					glTexCoord2f(0.0f, 1.0f); glVertex3f( size,  size,  size);

					// Top face
					glTexCoord2f(0.0f, 1.0f); glVertex3f(-size,  size,  size);
					glTexCoord2f(0.0f, 0.0f); glVertex3f( size,  size,  size);
					glTexCoord2f(1.0f, 0.0f); glVertex3f( size,  size, -size);
					glTexCoord2f(1.0f, 1.0f); glVertex3f(-size,  size, -size);

					// Bottom face
					glTexCoord2f(1.0f, 1.0f); glVertex3f(-size, -size, -size);
					glTexCoord2f(0.0f, 1.0f); glVertex3f( size, -size, -size);
					glTexCoord2f(0.0f, 0.0f); glVertex3f( size, -size,  size);
					glTexCoord2f(1.0f, 0.0f); glVertex3f(-size, -size,  size);

				glEnd();

			glPopMatrix();

		// We're done texturing, disable the settings
		glDisable(GL_RDPQ_TEXTURING_N64);

		// Does nothing for now, but keep it in case
		gl_context_end();

		// Send frame buffer to display (TV)
		rdpq_detach_show();
		x += 1.0;
		y += 0.5;
		y += 0.75;
	}
}
Set up OpenGL and Libdragon
The first step is to set up OpenGL and Libdragon to properly load the textures. Let’s focus on these lines:
// This sets the flag so that OpenGL knows to start drawing textures from TMEM
glEnable(GL_RDPQ_TEXTURING_N64);
// This tells OpenGL the size of the texture. Useful for scaling the texture properly
// If excluded, it will stretch a 1x1 pixel over the whole surface
glTexSizeN64(16, 16);

// After we're done drawing textured polygons, switch it off if you want to use another mode
glDisable(GL_RDPQ_TEXTURING_N64);
Uploading the texture
When it comes to uploading the texture, we do it the same way that we do with other hardware graphics.
// Set the RDP mode settings
rdpq_set_mode_standard();
rdpq_mode_filter(FILTER_BILINEAR);
rdpq_mode_blender(RDPQ_BLENDER_MULTIPLY);

// Upload the sprite
rdpq_sprite_upload(
	TILE0,
	brick_sprite,
	&(rdpq_texparms_t){
		.s.repeats = REPEAT_INFINITE,
		.t.repeats = REPEAT_INFINITE
	});
Uploading a sprite will always upload the whole sprite, which might be tough considering that you can only use larger RGBA textures (16/32-bit). This is useful if you’re uploading a whole sprite for mipmapping.
You can also use surfaces, which allows finer control over spritesheets:
rdpq_set_mode_standard();
rdpq_mode_filter(FILTER_BILINEAR);
rdpq_mode_blender(RDPQ_BLENDER_MULTIPLY);
rdpq_tex_upload_sub(
	0,
	&brick_surface,
	&(rdpq_texparms_t){
		.s.repeats = REPEAT_INFINITE,
		.t.repeats = REPEAT_INFINITE
	},
	0, 0,
	16, 16
);
Just remember that you need to upload to TMEM, not use one of the higher-level functions that draw to the screen like rdpq_sprite_blit().
Set the texture coordinates
The final step takes place when you’re drawing the model itself. You need to assign a texture coordinate to each vertex. In the cube example we’re using six squares, but for simplicity I’ll only show one:
float size = 1.0f;

glBegin(GL_QUADS);

	// Front face
	glTexCoord2f(0.0f, 0.0f); glVertex3f(-size, -size,  size);
	glTexCoord2f(1.0f, 0.0f); glVertex3f( size, -size,  size);
	glTexCoord2f(1.0f, 1.0f); glVertex3f( size,  size,  size);
	glTexCoord2f(0.0f, 1.0f); glVertex3f(-size,  size,  size);

glEnd();
As you can see, I’ve set the texture coordinates for each side to zero or one. This means that the texture is stretched to each corner of the square face. You can mess around with this to distort the texture in different ways if you’d like.
Summary
If you’ve got the hang of drawing textures using the RDPQ, this should be easy. The most complicated part is getting the texture coordinates set up correctly on your model. Just remember to set up Libdragon and OpenGL correctly, and then upload the texture to TMEM first.
Extra: waterfall effect
You can now add in some special effects like a waterfall by shifting the texture coordinates each frame:
glTexCoord2f(0.0f + (j%16)/16.0, 0.0f); glVertex3f(-size, -size,  size);
glTexCoord2f(1.0f + (j%16)/16.0, 0.0f); glVertex3f( size, -size,  size);
glTexCoord2f(1.0f + (j%16)/16.0, 1.0f); glVertex3f( size,  size,  size);
glTexCoord2f(0.0f + (j%16)/16.0, 1.0f); glVertex3f(-size,  size,  size);

j++;