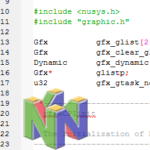
Hardware graphics

Another way of doing graphics besides the software method is to call in some help from the Reality Display Processor (RDP) to do some of the graphics rendering. Generally, it’s much faster to do it this way but it does require a bit more preparation.
Hardware graphics workflow
Working with hardware graphics on the RDP is a bit more complicated and requires a bit of planning since you can only perform certain actions in a particular order. This graphic will summarise the order in which to summon the different elements (for most cases):
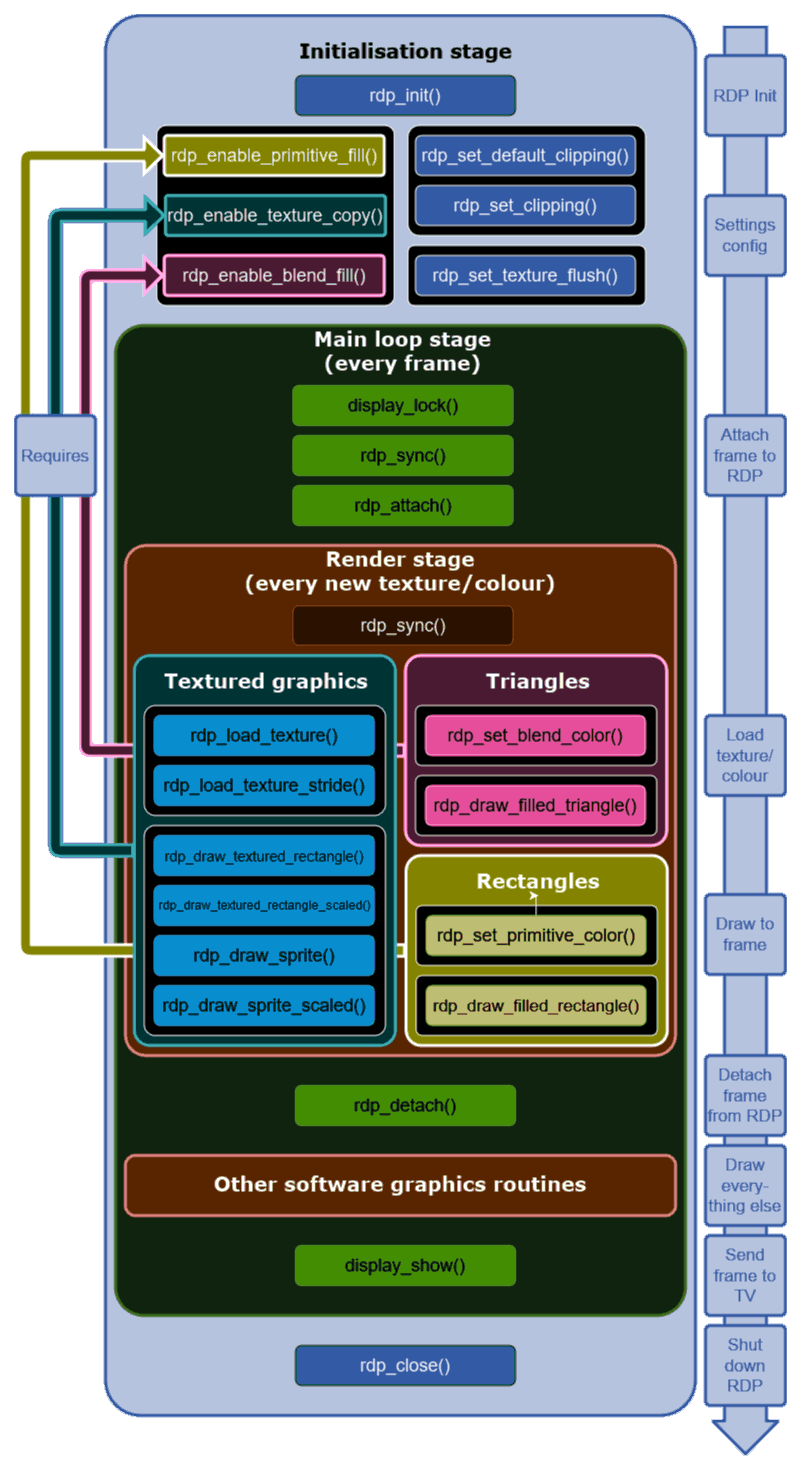
Note that this guide is only a guide – it is possible to have the enable functions in the render stage if you’re drawing different types of elements (eg rectangles for a GUI then sprites for game objects).
Initialising and closing the RDP
Before any RDP functionality can be used, the processor must be initialised. It should also be closed after it’s no longer being used.
void rdp_init(void);
void rdp_close(void);
It’s really as simple as that. Generally, you won’t be shutting down the RDP unless you are going to move to an exclusively software-based approach to rendering graphics.
Setting the settings
There are a few settings that determine the use of the RDP. These are necessary so that the RDP know how to process the data you send to it.
Clipping
Clipping refers to the process of not rendering objects or pixels that are outside the field of view (viewport) in order to save rendering time. This is most important with 3D environments that have primitives (triangles) that can appear in/out of the screen, but it is still applicable to 2D games. Clipping is determined with these functions:// Set custom clipping by determining the coordinates in this order:
// Left, top, right, bottom
void rdp_set_clipping(uint32_t tx, uint32_t ty, uint32_t bx, uint32_t by);
// Set clipping to use the whole screen (recommended)
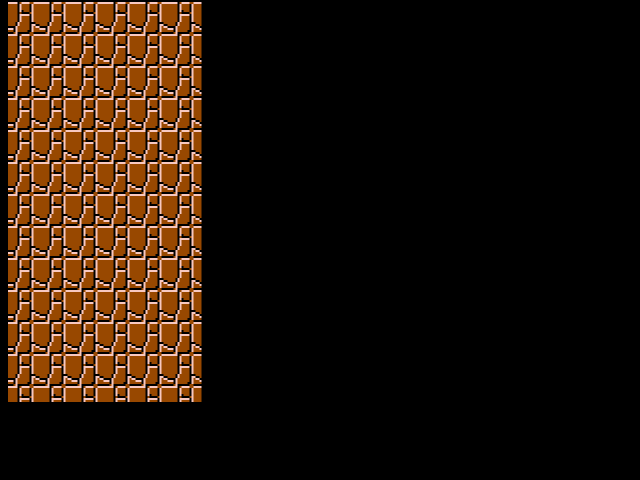
void rdp_set_default_clipping(void);Generally, you’ll want to use rdp_set_default_clipping() since this will enable the full display, but it might be useful to set custom clipping to use some kind of visual effect like a fog of war. Here’s an example where the only difference is the clipping method used:
Enablement
Before you can start calling any of the functions, it is important to enable the components that you’re going to use. These are pretty straightforward, so I’ll just list them here:
// Enable display of 2D filled (untextured) rectangles
// This must be called before using rdp_draw_filled_rectangle()
void rdp_enable_primitive_fill(void);
// Enable display of 2D filled (untextured) triangles
// This must be called before using rdp_draw_filled_triangle()
void rdp_enable_blend_fill(void);
// Enable display of 2D sprites
// This must be called before using any of the texture draw functions
void rdp_enable_texture_copy(void);
Note that only the last enablement function that was called will apply so they shouldn’t be called in succession like the above.
Synchronisation
When sending commands over to the RDP, it’s important to keep things synchronised so that you don’t get race conditions or overwritten textures. For example, if you send over a new texture before the RDP is done rendering, it will use the new texture instead of the old one. To solve this, the processors need to wait until they’ve finished all the dependent processes.
To synchronise the two processors, you can use this function with these parameters:
void rdp_sync(sync_t sync);

typedef enum {
	// Wait for any operation to complete before causing a DP interrupt
	SYNC_FULL,
	// Sync the RDP pipeline
	SYNC_PIPE,
	// Block until all texture load operations are complete
	SYNC_LOAD,
	// Block until all tile operations are complete
	SYNC_TILE
} sync_t;
Generally speaking, you’re going to want to use SYNC_PIPE every time you want to synchronise the processors. These are the most common situations that a sync is needed:
- Changing settings/attaching a new frame buffer
- Loading a new sprite into TMEM
A SYNC_FULL is called every time you use rdp_detach(), so there’s no real need to call it manually.
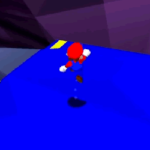
Attaching a frame buffer
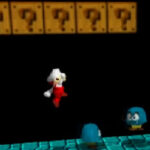
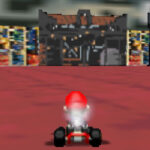
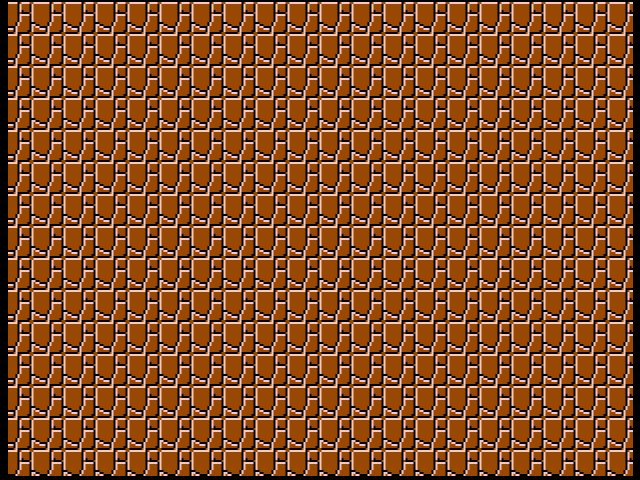
The first step to attach a frame buffer (display_context_t) to the RDP. This allows it to know where to draw all the objects that it renders. While you can still draw to it using software renders, you might get some conflicts that will produce unpredictable results like this (the blocks are hardware-generated but the red square is software-generated):
These are the functions that do the attaching:
void rdp_attach(surface_t* disp);
void rdp_detach(void);
These need to be performed before and after all RDP operations. It can be done multiple times per frame if needed, for instance if you want to perform software renderings in between hardware operations.
Note that detaching performs a full sync on the RDP, ensuring that all operations are complete. It’s good to make sure that the drawing operations are done before using display_show().
Rendering to the frame buffer
You can render using the RDP using various methods depending on the kind of object you want to draw: plain rectangle, plain triangle or textured sprite.
Plain rectangles
Drawing a plain rectangle works in a similar way as the software-based method, with a few differences. Here are the functions we’ll be using:
void rdp_enable_primitive_fill(void);
void rdp_set_primitive_color(uint32_t color);
void rdp_draw_filled_rectangle(int tx, int ty, int bx, int by);
Set the RDP mode: The first step is to make sure that we’re using rdp_enable_primitive_fill() mode for rectangles.
Set the rectangle colour: Every time we want to change the colour, we need to use rdp_set_primitive_color() to change the colour that the RDP will be using.
Draw the rectangle: For every rectangle we want to draw, we need to use rdp_draw_filled_rectangle() to specify its coordinates on the display. This takes two points: the top-left coordinate and the bottom-right coordinate.
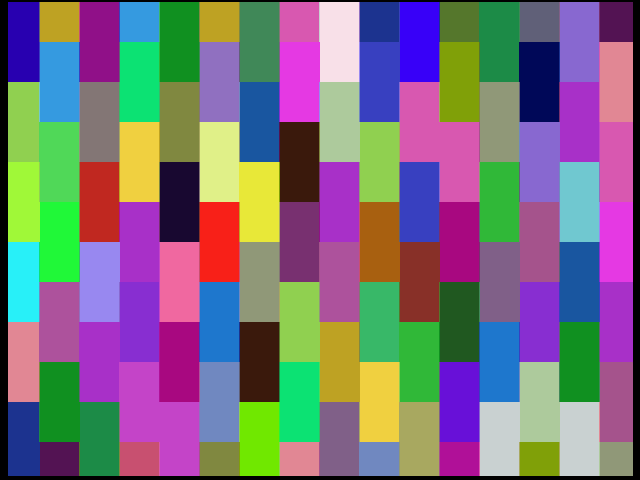
Rectangle Example
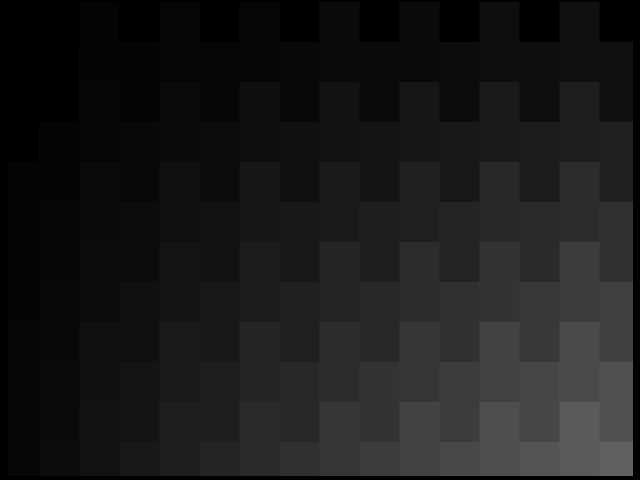
Here is an example that prints coloured tiles. One calculates colours using rand()%256, and the other uses it by calculating (i+1)*(j+1).
#include <libdragon.h>
#include <stdlib.h>

int main(void) {
	display_context_t disp;
	display_init(RESOLUTION_320x240, DEPTH_16_BPP, 2, GAMMA_NONE, FILTERS_RESAMPLE);
	rdp_init();
	int i, j;

	// Configure settings
	rdp_sync(SYNC_PIPE);
	rdp_set_default_clipping();
	rdp_enable_primitive_fill();

	// Main loop
	while (1) {
		// Load the frame buffer
		while(!(disp = display_lock()));
		// Attach the frame buffer
		rdp_sync(SYNC_PIPE);
		rdp_attach(disp);
		// Wait for the buffer to be attached
		rdp_sync(SYNC_PIPE);
		// Loop through horizontal offsets
		for (i=0; i<16; i++) {
			// Loop through vertical offsets
			for (j=-1; j<7; j++) {
				// Set a random colour
				rdp_set_primitive_color(graphics_make_color (rand()%256, rand()%256, rand()%256, 255));
				// Draw the rectangle
				rdp_draw_filled_rectangle(
					i*20,				// Start drawing every 20px horizontally
					j*40+(20*(i%2)),	// Draw every 40px, alternating +20px
					i*20+20,			// Make the rectangle 20px wide
					j*40+(20*(i%2))+40	// Make the rectangle 40px tall
					);
			}
		}
		// Detach the frame buffer
		rdp_detach();
		// Show the display
		display_show(disp);
		// Only perform the task once to avoid flickering
		break;
	}
}
Plain triangles
Working with triangles is very similar to working with rectangles, but with a different set of functions. Here are the ones we’ll be using:
void rdp_enable_blend_fill(void);
void rdp_set_blend_color(uint32_t color);
void rdp_draw_filled_triangle(float x1, float y1, float x2, float y2, float x3, float y3);
Set the RDP mode: Set the current mode of the RDP by using rdp_enable_blend_fill() mode to colour in triangles.
Set the triangle colour: Every time we want to change the colour, we need to use rdp_set_blend_color() to change the triangle fill that the RDP will be using.
Draw the triangle: We need to use rdp_draw_filled_triangle() for every triangle we want to draw to specify its location. There are three coordinates that are needed to specify, one for each corner on the triangle.
Example
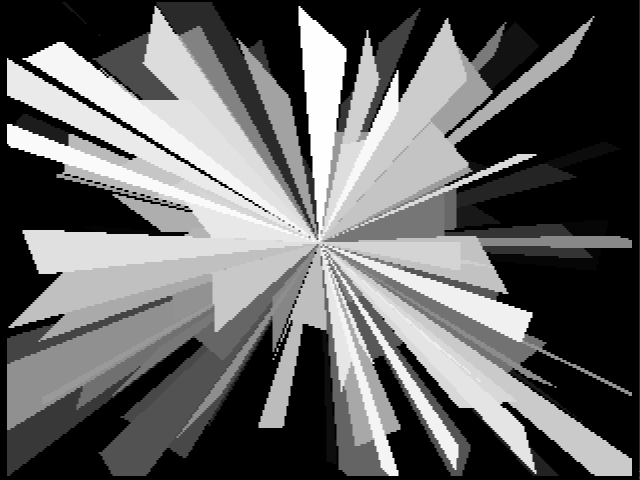
This example generates a bunch of random triangles that pop out from the centre of the screen. One uses random colours and the other has a gradient from black to white.

#include <libdragon.h>
#include <stdlib.h>
int main(void) {
display_context_t disp;
display_init(RESOLUTION_320x240, DEPTH_32_BPP, 2, GAMMA_NONE, FILTERS_RESAMPLE);
rdp_init();
int i, x, y;
// Configure settings
rdp_sync(SYNC_PIPE);
rdp_set_default_clipping();
rdp_enable_blend_fill();
// Main loop
while (1) {
// Load the frame buffer
while(!(disp = display_lock()));
// Attach the frame buffer
rdp_sync(SYNC_PIPE);
rdp_attach(disp);
// Wait for the buffer to be attached
rdp_sync(SYNC_PIPE);
// Draw 128 triangles
for (i=0; i<128; i++) {
// Pick a random coordinate
x = rand()%display_get_width();
y = rand()%display_get_height();
// Set a random colour
rdp_set_blend_color(graphics_make_color(i*2, i*2, i*2, 255));
// Draw the triangle
rdp_draw_filled_triangle(
display_get_width()/2, // X: display centre
display_get_height()/2, // Y: display centre
x, // X: random coordinate
y, // Y: Random coordinate
x + (rand()%64)-32, //
y + (rand()%64)-32
);
}
// Detach the frame buffer
rdp_detach();
// Show the display
display_show(disp);
// Only perform the task once
break;
}
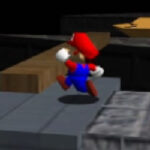
}Rendering sprites
While it is possible to make a game by only using rectangles and triangles, most 2D games are going to involve drawing sprites to the frame buffer. This can be done fairly simply by using the software rendering method, but the RDP offers better speed at the cost of requiring a bit more planning.
These are the functions involved in drawing sprites:
// Load a texture into TMEM
uint32_t rdp_load_texture(uint32_t texslot, uint32_t texloc, mirror_t mirror, sprite_t *sprite);
uint32_t rdp_load_texture_stride(uint32_t texslot, uint32_t texloc, mirror_t mirror, sprite_t *sprite, int offset);
// Draw a single sprite
void rdp_draw_sprite(uint32_t texslot, int x, int y ,  mirror_t mirror);
void rdp_draw_sprite_scaled(uint32_t texslot, int x, int y, double x_scale, double y_scale,  mirror_t mirror);
// Draw a rectangle that contains the sprites
void rdp_draw_textured_rectangle(uint32_t texslot, int tx, int ty, int bx, int by,  mirror_t mirror);
void rdp_draw_textured_rectangle_scaled(uint32_t texslot, int tx, int ty, int bx, int by, double x_scale, double y_scale,  mirror_t mirror);
Load the sprite from ROM to RAM
So as usual, the process starts by loading a sprite from the cartridge into RAM. This step does not involve the RDP so it can be done outside the main frame loop.
int fp = dfs_open("/mario-bros-tiles.sprite");
sprite_t *tiles = malloc( dfs_size(fp));
dfs_read(tiles, 1, dfs_size(fp),fp);
dfs_close(fp);
Load the sprite from RAM to TMEM
The next step is to load the sprite into the RDP’s TMEM using rdp_load_texture or rdp_load_texture_stride. The former is used to load from a single sprite, and the latter is for loading from a spritesheet. Remember to use rdp_sync(SYNC_PIPE) before doing this to make sure that you’re not overwriting a texture that is still in the process of being rendered.
// Single sprite load
rdp_sync(SYNC_PIPE);
rdp_load_texture(
	0,				// Texture slot (Leave at zero for now)
	0,				// TMEM offset (Leave at zero for now)
	MIRROR_DISABLED,// Whether to mirror the sprite or not
	tiles			// Sprite to load
	);

// Or if you're using a spritesheet:
rdp_sync(SYNC_PIPE);
rdp_load_texture_stride(
	0,				// Texture slot (Leave at zero for now)
	0,				// TMEM offset (Leave at zero for now)
	MIRROR_DISABLED,// Whether to mirror the sprite or not
	tiles,			// Sprite to load
	0				// Spritesheet offset (_stride only)
	);
The first two parameters (texture slot and TMEM offset) are generally best set to zero for the time being. This just means that it will all be written to the beginning of TMEM.
Draw a single sprite from TMEM to the Frame Buffer
The final step in drawing a texture is to draw it to the frame buffer. For this there are two methods, single sprites and textured rectangles.
Let’s start with single sprites. These work in a similar way to the software sprite renderer:
void rdp_draw_sprite(uint32_t texslot, int x, int y ,  mirror_t mirror);
void rdp_draw_sprite_scaled(uint32_t texslot, int x, int y, double x_scale, double y_scale,  mirror_t mirror);
rdp_draw_sprite() does what is says. It takes the sprite from the texture slot and draws it to a location in the buffer determined by x and y. This is the equivalent of the software method.
rdp_draw_sprite_scaled() does the same thing but with additional arguments to scale the sprite to make it bigger or smaller. This is not available using the software method.
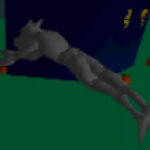
Here is an example of the two drawing methods in action:
You’ll notice that the RDP has some trouble growing the pixels so it’s generally not recommended to use this functionality.
#include <libdragon.h>
#include <stdlib.h>

int main(void) {
	display_context_t disp;
	display_init(RESOLUTION_320x240, DEPTH_16_BPP, 2, GAMMA_NONE, FILTERS_RESAMPLE);
	dfs_init(DFS_DEFAULT_LOCATION);
	rdp_init();

	// Load the sprite
	int fp = dfs_open("/mario-bros-tiles.sprite");
	sprite_t *tiles = malloc(dfs_size(fp));
	dfs_read(tiles, 1, dfs_size(fp),fp);
	dfs_close(fp);

	// Start scale factor at 0.1
	float f = 0.1;

	// Configure settings
	rdp_sync(SYNC_PIPE);
	rdp_set_default_clipping();
	rdp_enable_texture_copy();

	// Main loop
	while (1) {
		// Load the frame buffer
		while(!(disp = display_lock()));
		graphics_fill_screen(disp, graphics_make_color (0, 0, 0, 255));
		// Attach the frame buffer
		rdp_sync(SYNC_PIPE);
		rdp_attach(disp);
		// Load the texture to TMEM
		rdp_sync(SYNC_PIPE);
		rdp_load_texture_stride(0, 0, MIRROR_DISABLED, tiles, 0);
		// Draw a simple sprite
		rdp_draw_sprite(0, 50, 50, MIRROR_DISABLED);
		// Draw a scaled sprite
		rdp_draw_sprite_scaled(0, 100, 50, f, f, MIRROR_X);
		// Detach the frame buffer
		rdp_sync(SYNC_PIPE);
		rdp_detach();
		// Show the display
		display_show(disp);
		// Change the scale factor
		if (f>10) {
			f = 0.0;
		}
		f += 0.1;
	}
}
Drawing textured rectangles
Drawing a sprite can also be done by using a textured rectangle. Simply put, it is a rectangle that has a repeating sprite pattern within it. These are the functions that you can use to render a textured rectangle:
void rdp_draw_textured_rectangle(uint32_t texslot, int tx, int ty, int bx, int by,  mirror_t mirror);
void rdp_draw_textured_rectangle_scaled(uint32_t texslot, int tx, int ty, int bx, int by, double x_scale, double y_scale,  mirror_t mirror);
They work somewhat like a mix between rdp_draw_filled_rectangle() and rdp_draw_sprite(). You have to define the coordinates of the top-left and bottom-right corners like the rectangle, but you also have to send the texture slot, mirror and scaling (optional) like you do with sprites.
rdp_draw_textured_rectangle() draws a rectangle with a repeating sprite on it.
rdp_draw_textured_rectangle_scaled() does the same, but allows the sprite texture to be scaled.
Here is an example. It’s the exact same as the source code for the sprites without rectangles, except for the lines below.
// Draw a simple repeating sprite in a rectangle
rdp_draw_textured_rectangle(0, 50, 50, 97, 97, MIRROR_DISABLED);
// Draw a scaled sprite in a rectangle
rdp_draw_textured_rectangle_scaled(
	0,				// Texture slot
	120,			// Top left X
	50,				// Top left Y
	216,			// Bot right X
	146,			// Bot right Y
	f,				// X scale factor
	f,				// Y scale factor
	MIRROR_DISABLED	// Mirror mode
	);
Mirroring
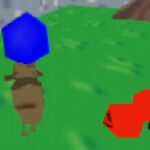
You might have noticed in the function prototypes that there is a parameter called mirror. As the name implies, it is used to mirror the sprite. This can be done either on the X-axis, Y-axis, both axes or neither by using the values in this enum:
typedef enum {
    // Disable texture mirroring
    MIRROR_DISABLED,
    // Enable texture mirroring on x axis
    MIRROR_X,
    // Enable texture mirroring on y axis
    MIRROR_Y,
    // Enable texture mirroring on both x & y axis
    MIRROR_XY
} mirror_t;
These can be applied in both the loading Functions and the drawing functions.
I think this might be a bug, but mirroring in the texture load appears to be a boolean that enables mirroring, and then mirroring in the texture draw determines the direction of the mirror. This diagram shows what I mean:
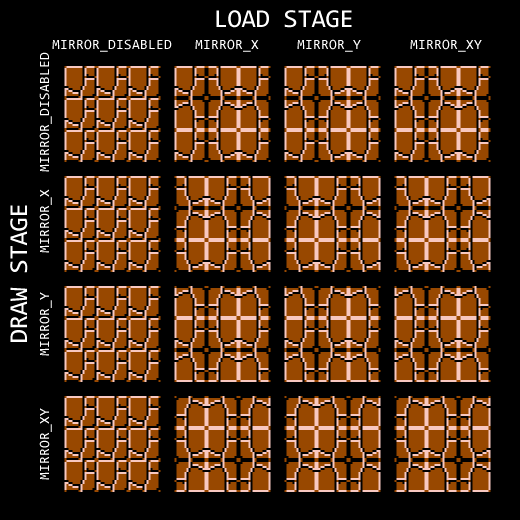
So it’s not possible to use this method to draw a repeating (non-mirrored) pattern where each cell is individually mirrored. If you want to do that you’ll have a few methods to choose from, each with their own disadvantages:
- Render the texture using mirroring, but only draw one sprite. Then repeat the sprite draw for each time you want it repeated. (More RDP intensive)
- Manipulate the sprite in memory using a custom function (More CPU intensive):
- Read from file in a different order
- Change the order of the pixels once it is in memory
- Use a spritesheet where different offsets represent different rotations. (More memory intensive)
Advanced texture loading
As of now, we’ve only been loading textures into TMEM one at a time, but there’s a way to make this more efficient. It’s a bit more complex, so we’ll leave it for another page (TBD)