Hello Triangle

A Hello Triangle program is the graphical equivalent of a “Hello World!” program in any kind of programming language. It’s meant to be the simplest program possible for either learning purposes or it can also be used as a basis for the rest of your project.
Objective
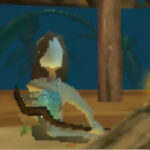
What we essentially want to do is to create this scene in OpenGL:

The hello triangle code
This is about as small as I could write the code. Any smaller and it would cause the triangle to fail rendering.
#include <libdragon.h>
#include <GL/gl.h>
#include <GL/glu.h>
#include <GL/gl_integration.h>

void render_triangle()
{
	// Begin OpenGL compatibility with the RDP
	gl_context_begin();

	// Set the camera's position
	glMatrixMode(GL_MODELVIEW);
	glLoadIdentity();
	gluLookAt(
		0, -10.0, 0.0,
		0, 0, 0,
		0, 0, 1
		);

	// Draw the triangle
	glBegin(GL_TRIANGLES);
		glColor3f(1.0f, 0.0f, 0.0f); // Red color
		glVertex3f(-1.0f, -1.0f, -1.0f);
		glVertex3f(-1.0f, -1.0f, 1.0f);
		glVertex3f(1.0f, -1.0f, 1.0f);
	glEnd();

	// Does nothing for now, but keep it in case
	gl_context_end();
}

int main(void)
{
	// Initialise the various systems
	display_init(RESOLUTION_640x480, DEPTH_16_BPP, 3, GAMMA_NONE, FILTERS_DISABLED);
	rdpq_init();
	gl_init();

    // Setup
    float aspect_ratio = (float)display_get_width() / (float)display_get_height();
    float near_plane = 1.0f;
    float far_plane = 50.0f;

    // Set the viewing area
    glMatrixMode(GL_PROJECTION);
    glLoadIdentity();
    glFrustum(
        -near_plane*aspect_ratio,
        near_plane*aspect_ratio,
        -near_plane,
        near_plane,
        near_plane,
        far_plane
        );

	// Main loop
	while(1) {
		// Start a new frame
		// Get the frame buffer and z-buffer
		surface_t* disp = display_get();
		surface_t* zbuf = display_get_zbuf();
		// Attach the buffers to the RDP
		rdpq_attach_clear(disp, zbuf);

		// Fill the background with white
		rdpq_set_mode_fill(RGBA32(0xFF, 0xFF, 0xFF, 0));
		rdpq_fill_rectangle(0, 0, display_get_width(), display_get_height());

		// Render a triangle with OpenGL using the function above
		render_triangle();

		// Send frame buffer to display (TV)
		rdpq_detach_show();
	}
}
Code breakdown
The first bit is just the preprocessor header includes. These contain Libdragon’s OpenGL integration functions which allow us to use OpenGL in our game.
#include <libdragon.h>
#include <GL/gl.h>
#include <GL/glu.h>
#include <GL/gl_integration.h>
Main() function
The program starts, as it should, with the main() function. In it, the first step is to initialise all the various subsystems. For the sake of simplicity, we’ll be initialising just the bare essentials: the display, the RDP and OpenGL:
// Initialise the various systems
display_init(RESOLUTION_640x480, DEPTH_16_BPP, 3, GAMMA_NONE, FILTERS_DISABLED);
rdpq_init();
gl_init();
The last part before entering the main loop is to define the frustum. The frustum is a truncated pyramid that defines the viewing area that is rendered. Objects outside the frustum are not rendered which helps cut down on rendering time.
The first three lines define some floats to help with defining the frustum. glMatrixMode(GL_PROJECTION) tells OpenGL that we’re going to define how we’re projecting the 3D area onto a 2D frame buffer. glLoadIdentity() loads the identity matrix, which is like starting the transformation from a blank slate.
The third line defines the frustum itself with glFrustum(). The first two parameters are the left/right sides of the near plane, then the top/bottom sides of the near plane (all these can be positive or negative). The last two are the distance of the near/far plane which must be positive. The size of the far plane is calculated by the function, so only the LRTB dimensions of the near plane need to be defined. The frustum is shown here highlighted in grey:

// Setup
float aspect_ratio = (float)display_get_width() / (float)display_get_height();
float near_plane = 1.0f;
float far_plane = 50.0f;

// Set the viewing area
glMatrixMode(GL_PROJECTION);
glLoadIdentity();
glFrustum(
    -near_plane*aspect_ratio, near_plane*aspect_ratio,
    -near_plane, near_plane,
    near_plane, far_plane
    );
Main loop
Now that the setup is complete, we can look at the main loop. This section is what processes every frame in our demo. It just so happens that this just displays a static image so every frame is going to be identical.
This first section is very similar to what we’d use if making something using RDPQ. The only difference is that we need to include a z-buffer since we’re rendering this triangle in 3D.
// Get the frame buffer and z-buffer
surface_t* disp = display_get();
surface_t* zbuf = display_get_zbuf();
// Attach the buffers to the RDP
rdpq_attach_clear(disp, zbuf);
Next, we need to clear the frame buffer by filling it with white. We don’t need to bother with the z-buffer since we only have one primitive to render.
// Fill the background with white
rdpq_set_mode_fill(RGBA32(0xFF, 0xFF, 0xFF, 0));
rdpq_fill_rectangle(0, 0, display_get_width(), display_get_height());
render_triangle() calls the custom OpenGL function which will be described further down this page. rdpq_detach_show() detaches the frame buffer from the RDP and sends it to the N64’s video output, allowing it to be seen on screen.
// Render a triangle with OpenGL using the function above
render_triangle();

// Send frame buffer to display (TV)
rdpq_detach_show();
Now that the frame buffer has been sent out to the screen, it’s time to loop back and render the next frame.
OpenGL functionality
All of the OpenGL functionality is found inside the render_triangle() function.
The gl_context_begin() is a libdragon function that allows for the N64 to be compatible with OpenGL functions. It must be put before any calls to OpenGl functions.
// Begin OpenGL compatibility with the RDP
gl_context_begin();
First we need to set up the camera’s position in the scene. glMatrixMode(GL_MODELVIEW) sets OpenGL’s mode to do camera operations. glLoadIdentity() Loads the identity matrix, essentially telling it to start from scratch. It’s the matrix equivalent of clearing a buffer.
The final function gluLookAt() is what determines the camera’s position and orientation. The first three parameters are the xyz coordinates of the camera. The next three are the xyz coordinates of the target where the camera is pointing towards. The final three parameters are the xyz values of the camera’s ‘up’ vector.
// Set the camera's position
glMatrixMode(GL_MODELVIEW);
glLoadIdentity();
gluLookAt(
	0, -10.0, 0.0,	// Camera eye coordinates
	0, 0, 0,			// Camera target coordinates
	0, 0, 1				// Camera orientation
	);
This next section is what actually defines the triangle itself, called the vertex specification sequence. glBegin() and glEnd() bookend the sequence so the script knows its delimitations. GL_TRIANGLES tells OpenGL that what we want is to draw a single triangle.
glColor3f() tells OpenGL to set the colour to red, and glVertex() denotes tthe coordinates of each of the triangle’s vertices.
// Draw the triangle
glBegin(GL_TRIANGLES);
	glColor3f(1.0f, 0.0f, 0.0f); // Red color
	glVertex3f(-1.0f, -1.0f, -1.0f);
	glVertex3f(-1.0f, -1.0f, 1.0f);
	glVertex3f(1.0f, -1.0f, 1.0f);
glEnd();
As of writing this page, the final line of code does nothing, but it might have some functionality added in the future so it’s best to leave it in for the sake of future-proofing. Put it at the end of your OpenGL statements.
// Does nothing for now, but keep it in case
gl_context_end();
Conclusion
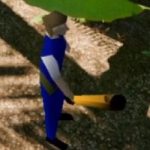
Now that the code is done, it’s time to compile it. This doesn’t reply on any external resources using DFS so the standard makefile will work fine. Then it’s time to run it and you should get something like this:

And that’s how you do a ‘Hello Triangle’ program using OpenGL!